
Our long-time client highlighted the need to improve their service process and align teams better. In order to make them successful, we worked on moving their team and tickets from Zendesk support to HubSpot's Service Hub so all their data is in one place and we enriched the CRM for teams to work better together.
A lot of businesses use Zendesk for their customer service needs because of its extensive customisability and well-documented data API. However, this means that all the useful data about the customer's relationship and experience with your product and service is siloed away in another application, needing you to find workarounds to pull in that data in the places where they are relevant. Zendesk provides integrations with other business tools to make this process as approachable as possible, but using the same system for your sales, marketing and customer service means that you reduce cognitive load and make it easily to share data between business units.
Integration and streamlining is the name of the game
Solving for our client meant that we worked hard on creating a seamless process to create a new way of working and remove the kinks that the old way presented. One of which was key. Data was not in the one place and there was no single view of each organisation and their people so agents could work with other teams to solve any issues.
Moving from Zendesk to HubSpot Service Hub doesn't mean that you need to lose all the data and ticketing information you currently have. HubSpot provides a myriad of methods to move both your tickets and knowledge base articles over to Service Hub. At Connect Labs, we enable customers to smooth out the rough edges between your business units and this is how we helped one of our customers to set up shop in Service Hub.
What are the main benefits of using Service Hub over its competitors?
Ever since its update in March 2022, HubSpot's Service Hub provides an efficient and easy-to-use system for HubSpot users to deliver customer service. HubSpot CRM users enjoy a variety of tools, from engagement tracking & email automation to robust reporting and notifications. HubSpot Service Hub integrates with the CRM to help complete the customer journey after a purchase or transaction has occurred.
HubSpot CRM users enjoy a variety of tools, from engagement tracking & email automation to robust reporting and notifications. While the CMS and CRM tools in HubSpot help your business get customers through the door, Service Hub helps deepen customer relationships by providing an all-in-one customer support solution that effortlessly integrates back into the CRM.
Why is this important?
.gif?width=385&height=385&name=flywheel-animated%20(1).gif)
Understand the customer better
Seeing all your customer issues along with the other information logged in the CRM, helps paint a better picture of your customer, as well as your relationship with them. This can help in decision-making, influence further interactions with the customer or even predict future customer behaviour.
Find areas for improvement
Seeing all the support data from your sales contacts in one place helps you understand how your customers use your product or service. It helps identify possible improvements or enhancements that would increase customer satisfaction.
Reporting
HubSpot Service Hub comes with easy to configure reporting tools that help identify inefficiencies in the support process and recurring issues that the customers might have.
Automation Automation Automation
Tickets are just like every other HubSpot Object! This means they can be used in workflows or other automation tools. They can also be queried via the HubSpot API (along with the customer, company and deal data), in case you use custom reporting tools.
Steps to getting started with HubSpot's Service Hub
Step 1: Configure Service Hub for use
Setup a 'Support Inbox'
This will be the default inbox through which you will communicate with the customer. Having a separate inbox for this means that your customer success team and your sales team can work out of different inboxes (or both!) without confusion.
Go to Settings > Tools > Inbox > Inboxes. Click the Actions button on the top right and select 'Create a New Inbox'.
After you follow the instructions in the setup wizard, Click on the 'Connect a Channel' button.
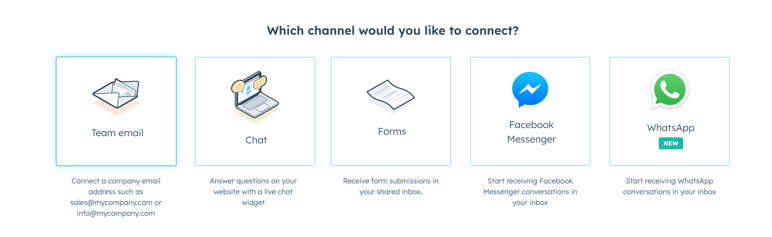
As you can see, HubSpot supports an ever-growing list of possible support channels for your business to choose from. For this example we are going to go with email.
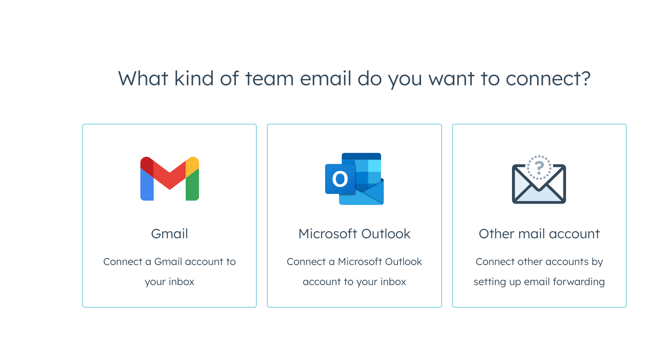
Go on to select the type of email inbox you want to connect. If you want to send emails from the HubSpot inbox using your custom email domain remember to configure the DKIM and SPF rules correctly.
Setup Ticket properties
Every business will have different fields that would best aid their success team to understand the issues faced by their customer. Hub
Spot Tickets work just like HubSpot Contact and Companies with their own editable properties
Go to Settings > Data Management > Objects > Tickets
In this menu you can use the 'Manage ticket properties' menu to add custom properties
After that you can 'Customize the create ticket form' which is the user-facing form that customers will be asked to fill out for their support request.

The Pipelines tab allows you to setup different stages in your ticketing pipeline. It works in the same way that you are used to in the Sales Pipelines. This is just one example of how having just one approach to managing all types of data across all your business units reduces cognitive load.
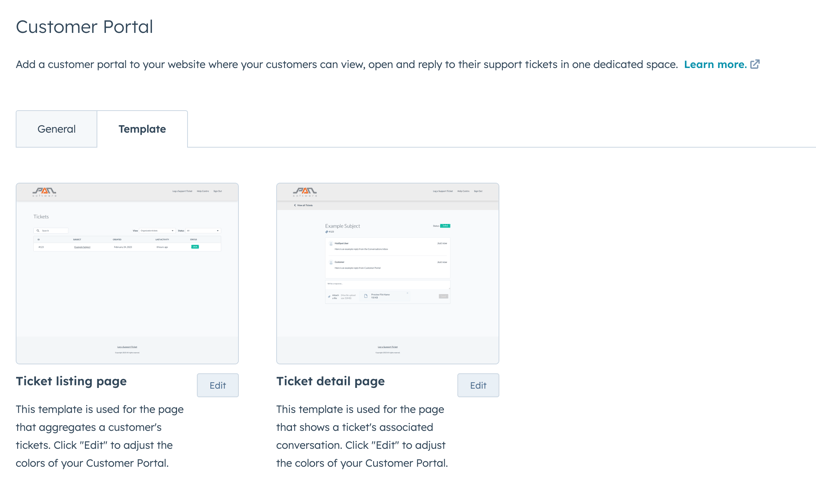
Setup Customer Portal
Go to Settings > Tools > Website > Customer Portal
In this menu you can customise the URL at which customers can find your Customer Portal, set your language and set up access permissions.
Access permissions on Service Hub works great with HubSpot Contact Lists (active and static). You can assign contacts to a List using a criteria and then allow all contacts on that list to access your Customer Portal.
Remember to set the Default Inbox on this page as the 'Support Inbox' that you created earlier.
And you're done!
Heading to Conversations > Inbox and selecting your 'Support Inbox' from the dropdown can help you stay on top of all the conversations that flow in from customers (just like Sales Hub and Marketing Hub)
If you rather work from a traditional ticket / Kanban View, head over to Service > Tickets to see a status wise split of all the tickets.
Just like every other HubSpot product, you can create custom views, configure default properties, adjust the left and right panels in your ticket and much much more.
Heading over to 'Workflows' in the top bar gives you the ability to perform all the wonderful automation rules that you could apply on Sales and Marketing Hub on your Tickets!
The 'Reports' tab has a myriad of useful out-of-the-box reports that you can use to understand your service data and take meaningful actions.
Step 2: Migrating Tickets from Zendesk to Service Hub
If you have tickets on Zendesk that you want to bring over to Service Hub, use the Zendesk Export function to export all your data.
This is how your Zendesk data maps to HubSpot
- Zendesk Organisations -> HubSpot Company
- Zendesk Users -> HubSpot Contacts
- Zendesk Tickets -> HubSpot Tickets
After receiving these files, modify the data to meet the import criteria for HubSpot import.
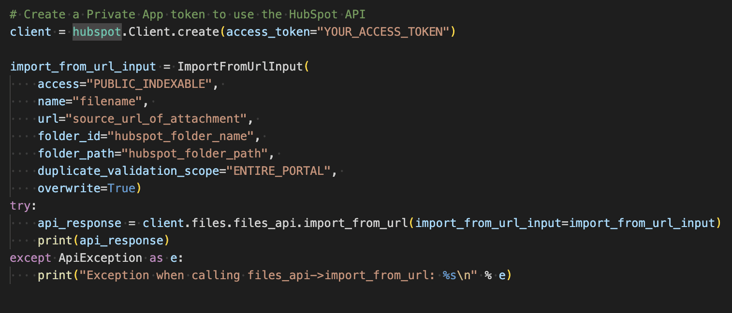
All attachments made to your tickets in Zendesk is available as URLs in the ticket data.
We can also move these attachments to HubSpot using the HubSpot Files API endpoint using the `import-from-url` endpoint
Now you have all your legacy tickets on HubSpot and customers can continue to reach out to you on these old tickets and you don't have to lose any data at all.
Step 3: Onboard Customer Support Agents
There are videos available on HubSpot Academy to help your customer success team get better acquainted with how Service Hub works.
But before going into those, it is important to map out your agent's journey, i.e the lifecycle of a ticket in your new system. This usually involves discussions of what the agent and the customer is expected to do in each stage in the ticketing pipeline.
After this process has been mapped out, some of the other important things to ensure is
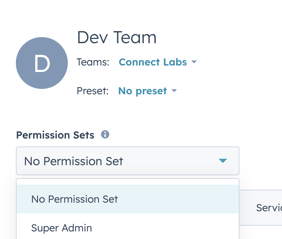
Agent Access permissions
Head into Settings > Account Setup > Users & Teams. Navigate to the Permission Sets tab and create a new Permission Set for your Agents. This ensures that different permissions can just be assigned to the permission set, which in term can be assigned to the agent as they are onboarded.

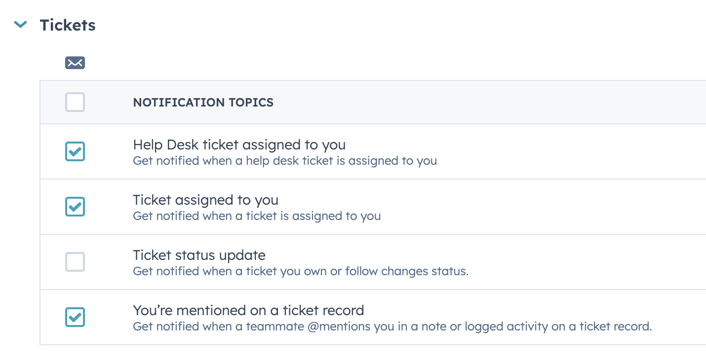
Notification Setup
The options under Settings > Your Preferences > Notifications allows the agent to customise when and how they get notified by different HubSpot events and ticket updates.
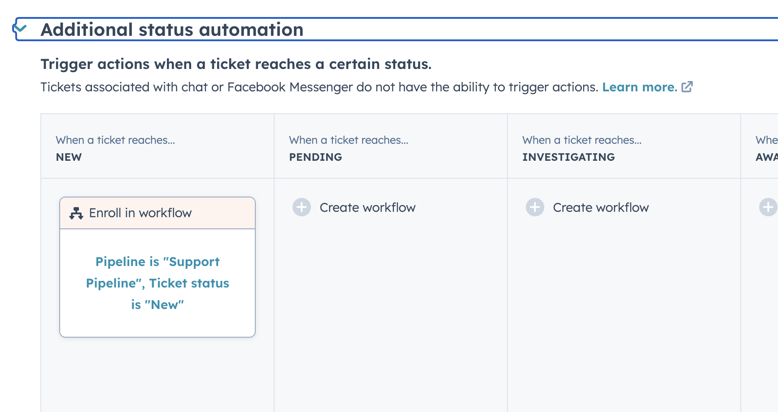
Ticket Automation
Service Hub has a special section under Settings > Data Management > Objects > Tickets > Pipelines > Automate that allows you to quickly set up workflows for each stage of the ticket pipeline. These are extremely customisable and helps to speed up your entire customer support process.
Step 4: Onboard Customers
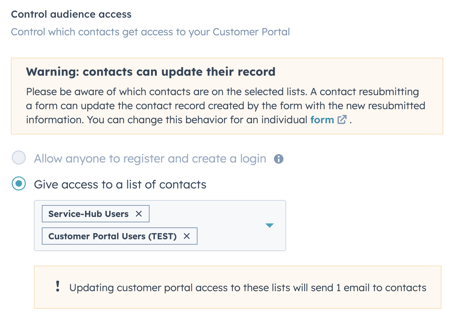
After your Service Hub is setup, you need to setup your customers accounts so that they can login and file tickets. Customers will use the same login that they use on your HubSpot hosted website to login to their customer portal. The fastest way to do this, is to create a HubSpot Contact List populated with the Contacts that you want to grant access to.
After this head to Settings > Tools > Website > Customer Portal. In the General Tab, scroll down to 'Control Audience Access' and choose the correct HubSpot Contact List. This action will send out a HubSpot Registration Email to all the contacts that now have access to the portal.
The users will be prompted to set a password, that they can use to login to your portal after registration is complete.
Outcome
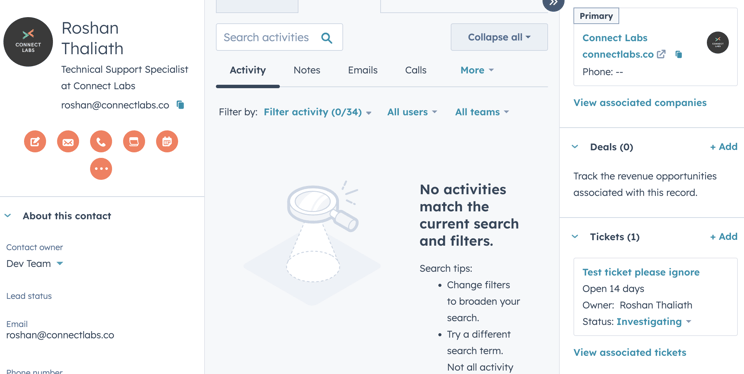
Sales, Marketing, Communication, Service - all in one view
Our client now has the ability to see across multiple customer facing business units in a single view. Having all this information about a customer surfaced in one place means smoother decision making and deeper customer relationships.
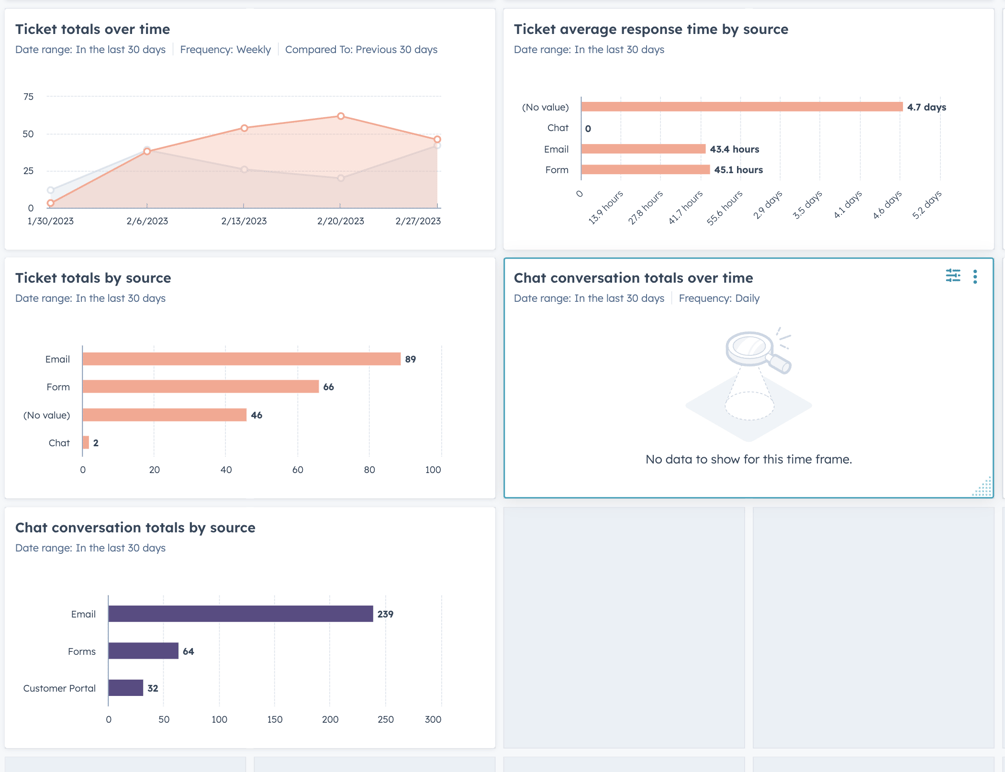
Reporting
HubSpot Reporting tools and Dashboard functionality to dive into support metric and show them along with other business unit data.
Our client loves the simplicity of their new tech stack and all of the powerful tools that came along with it. Managing this project was a way to ensure that we were able to help them be more productive and improve their service process while increasing our work happiness too! If you have something CRM-related on your mind, get in touch with us and let's talk!


