Whitespace (or negative space) is an important design element online, and that includes email. Not only does whitespace make your emails look nicer, it also creates a better user experience for the recipient.
You can use whitespace in two different ways: passive or active. Passive whitespace is used primarily for aesthetic and UX purposes, such as preventing content from looking cramped (e.g. margins, line spacing, paragraph spacing). This type of whitespace improves the legibility and comprehension of text.
Active whitespace is used to draw attention to something. For instance, surrounding a CTA with space will emphasise it by giving it visual importance.
So now you know why whitespace is so important, how do you add it to your emails in HubSpot? The best way is to edit the inline CSS of your modules or module groups in the email template.
How to add whitespace in an email template
Step 1: Edit email template
Go to Content > Design Manager. Find the email template you want to change and click on it to edit.
Step 2: Edit CSS
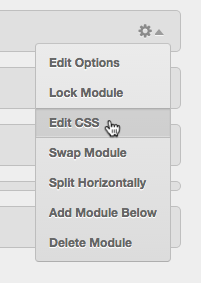
Find the module you want to add spacing to and click its gear icon. Select Edit CSS from the dropdown menu (or Edit CSS Declarations if it's a module group):

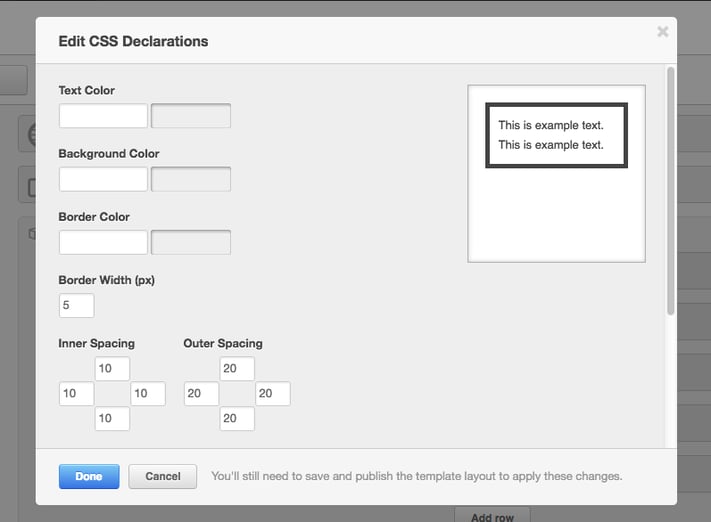
This will bring up a window where you can add inline CSS to the module.
Step 3: Add outer spacing
Within the Edit CSS window you can customise a module's:
- Text colour
- Background colour
- Border colour
- Border width
- Inner spacing (the padding between the border and the module's contents)
- Outer spacing (the padding between the module and its surrounds)
To add spacing above, below, to the left or to the right of the module, enter a pixel value into the corresponding box in the Outer Spacing section. 10px is a good amount to start with.
In the following example, the module will have a 5px-wide border, 10px of inner spacing on all sides and 20px of outer spacing on all sides:

The preview pane (top right of the window) gives you a rough idea of what the changes will look like.
When you're happy with the changes you've made, click Done.
Step 4: Publish changes
To apply your changes to the email template, click Publish Changes (top right).
Conclusion
Adding negative space between and around modules in an email creates a better user experience. Passive whitespace improves readability and comprehension of your content. You can use active whitespace to guide the reader's eyes towards a CTA, potentially increasing click-through-rates.
Tags:
HubSpot
September 8, 2016

